Prepare for a show-stopping dessert that’s perfect for Halloween!
This Dark Chocolate Cake with Oozing Raspberry “Blood” combines rich, fudgy chocolate layers with tangy cream cheese frosting and a dramatic raspberry filling.
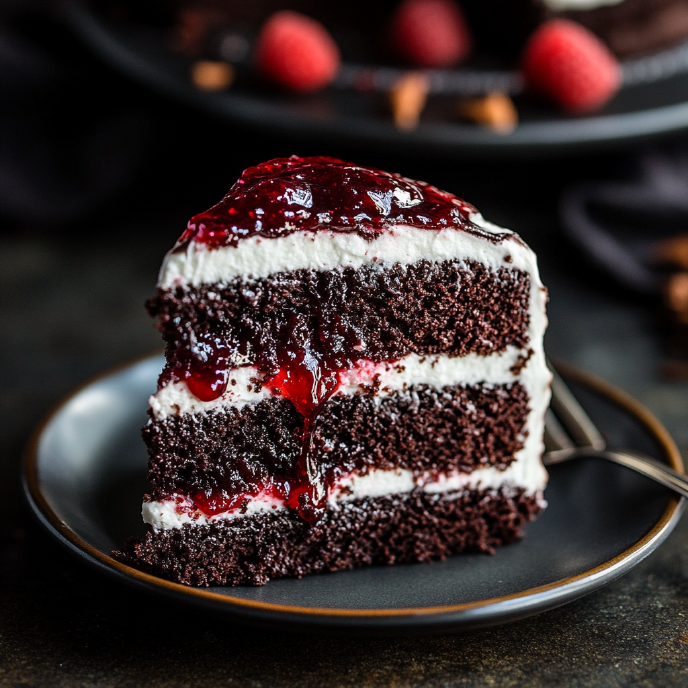
The best part? The raspberry “blood” is frozen before assembly, so when you cut into the cake, it oozes out, creating a spectacular effect!
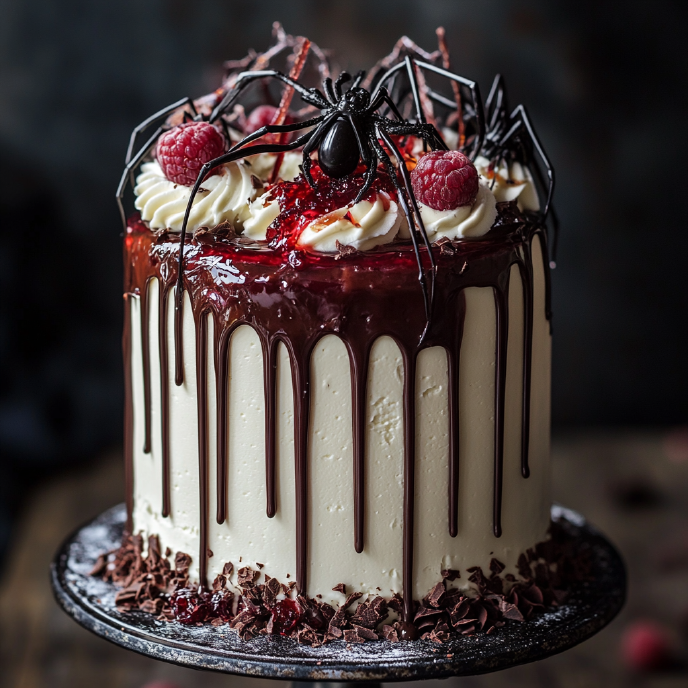
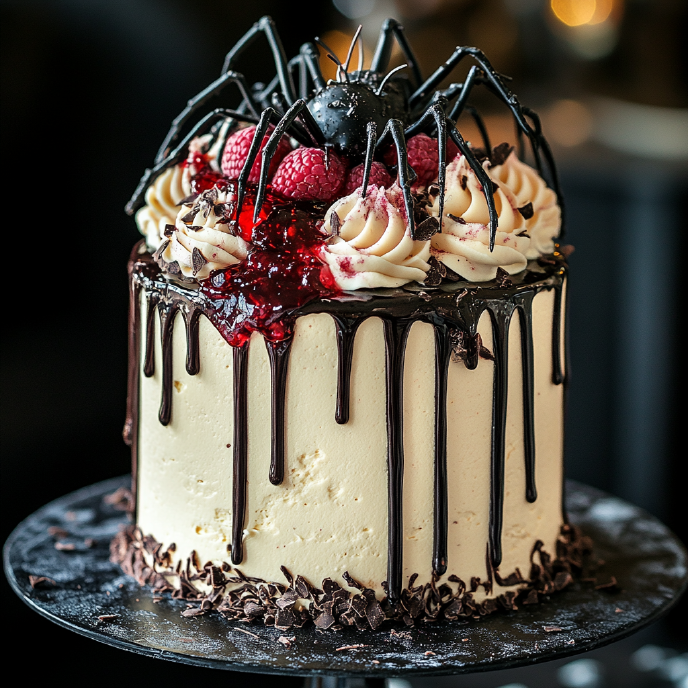
Topped with shaved chocolate, fresh berries, and creepy plastic spiders, this cake is as delicious as it is spooky.
Why You’ll Love This Recipe
This cake is a ghoulish delight!
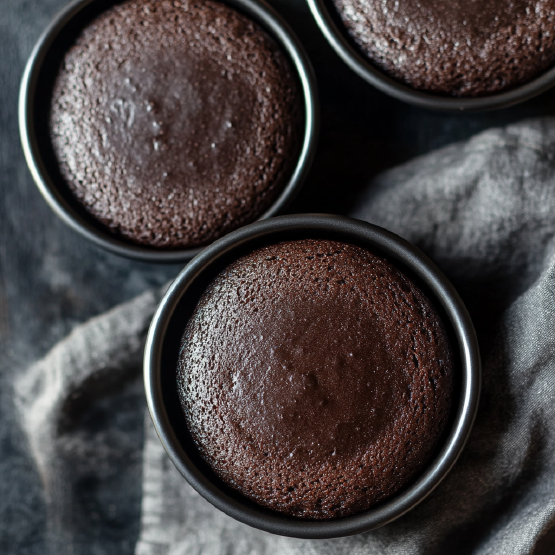
The dark chocolate layers are dense and fudgy, perfectly complemented by the sweet-tangy cream cheese frosting.
But the real star of the show is the raspberry “blood” filling—it’s loose enough to ooze dramatically when the cake is cut, making it the perfect centerpiece for your Halloween celebration.
Plus, the combination of rich chocolate, tart berries, and creamy frosting is downright irresistible.
Ingredients
Each ingredient in this cake plays a crucial role in creating the perfect texture and flavor. Here’s what you’ll need:
- All-Purpose Flour: The base of the recipe, providing structure.
- Granulated Sugar: Adds sweetness and moisture to balance the cocoa.
- Dark Cocoa Powder: Rich, deep chocolate flavor; sifted for a smooth batter.
- Baking Powder & Baking Soda: Leavening agents for a light, airy texture.
- Salt: Enhances flavor, balancing the sweetness and bitterness.
- Warm Water: Activates the cocoa, bringing out its full flavor.
- Sour Cream: Adds moisture and tang, making the cake tender.
- Vegetable Oil: Keeps the cake moist and soft.
- Eggs: Bind the ingredients and add richness.
- Vanilla Extract: Boosts the overall flavor with a sweet, aromatic touch.
- Instant Espresso or Coffee: Deepens the chocolate flavor without overpowering it.
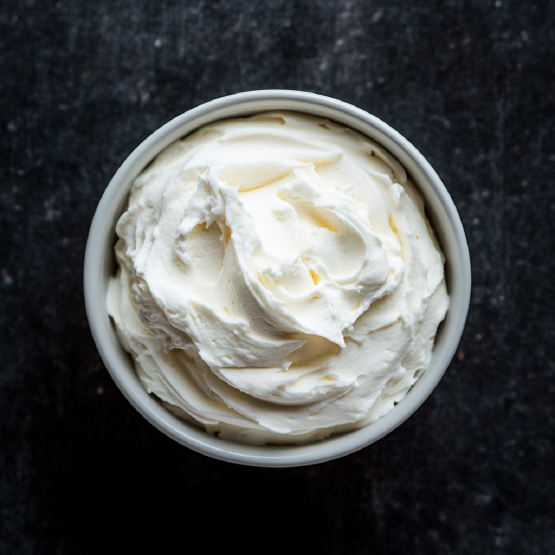
- Cream Cheese Frosting: Blend butter, icing sugar, cream cheese, and vanilla until smooth. It’ll provide a creamy, tangy contrast to the rich cake.
- Raspberry Jam: Forms the “blood” filling, which is frozen before assembly to create the oozing effect when the cake is cut.
- Shaved Dark Chocolate: Adds texture and an elegant finish to the cake.
- Fresh Raspberries: A fresh garnish that pairs perfectly with the raspberry filling.
- Plastic Spiders: Optional but fun for Halloween, adding a spooky touch to the cake.
How to Make Dark Chocolate Cake with Oozing Raspberry “Blood”
Let the fun begin!
This cake is surprisingly easy to assemble, but the results are dramatic.
The key to getting the “blood” to ooze is freezing the raspberry filling beforehand so it thaws while the cake chills.
The frosting will keep it in place until you cut it open.
Here’s how to make it:
- Prep and freeze the jam using the instructions below.
- Preheat the oven to 175°C (350°F) and grease and line three 20cm (8-inch) cake pans.
- Whisk the dry ingredients (flour, sugar, cocoa powder, baking powder, baking soda, salt) in a large bowl. Set aside.
- Whisk the wet ingredients (water, sour cream, oil, eggs, vanilla, espresso) in a separate bowl until fully incorporated.
- Mix the wet and dry ingredients with a spatula until just combined. If using, fold in the chocolate.
- Divide the batter evenly between the cake pans. Bake for 20-25 minutes or until a toothpick comes out with a few moist crumbs.
- Cool the cakes in the pans for 15 minutes, then flip onto a wire rack to cool completely.
- Beat the frosting ingredients (butter, icing sugar, cream cheese, vanilla) until thick and smooth, about 5-7 minutes.
- Assemble the cake by layering the frosting and frozen raspberry filling. Pipe a ring around each layer to form a dam. Repeat with the remaining layers.
- Frost the cake outside and refrigerate for 2-3 hours to set.
- Melt the chocolate and butter, letting it cool slightly before drizzling around the top for a drip effect.
- Decorate the cake with rosettes, chocolate shards, raspberries, or plastic spiders. Slice and enjoy!
How to Make and Freeze Raspberry Jam for the Oozing Filling
Let’s create the perfect “blood” effect!
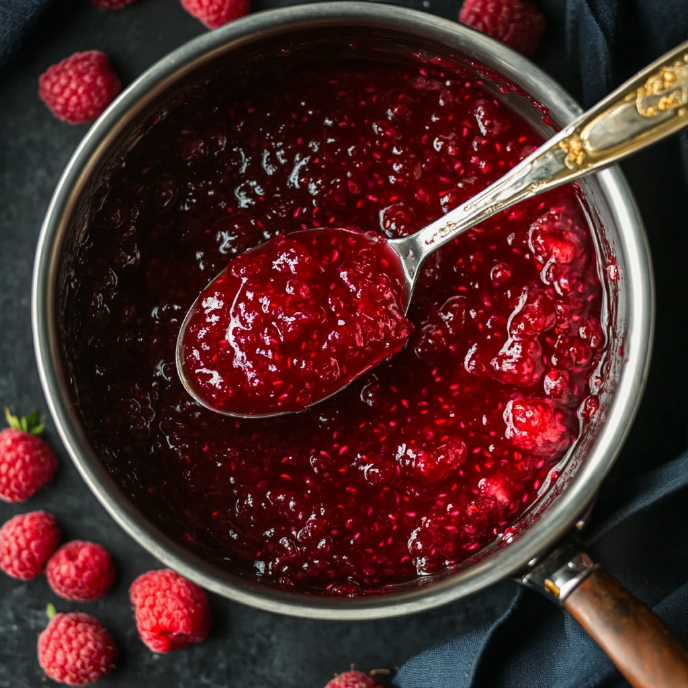
For this cake, the loose raspberry jam filling is key to creating that dramatic oozing effect when the cake is cut.
Here’s a recipe for a slightly loose raspberry jam that can be frozen into discs or pockets. It’ll thaw within the frosting, then seep out like “blood” pockets when sliced
Ingredients:
340g frozen raspberries (12 ounces)
125g sugar (1/2 cup)
1 tablespoon lemon juice
60ml water (1/4 cup)
1 teaspoon cornstarch, optional
Method:
- Cook the Jam: In a medium saucepan, combine the raspberries, sugar, and lemon juice. Add the water and bring the mixture to a simmer over medium heat. Stir occasionally to help the raspberries break down.
- Optional Thickening: If you want the jam to be slightly thicker but still runny, dissolve 1 teaspoon of cornstarch in 1 tablespoon of water and stir it into the jam. Continue cooking for about 5 more minutes, or until the jam is slightly thickened but still loose enough to ooze.
- Cool: Remove from heat and let the jam cool completely.
Freezing Methods for the Raspberry “Blood”
Now that you have your loose jam, it’s time to freeze it in the best way to create those oozing pockets.
Here are two options:
Option 1: Freeze Jam Discs
For larger, continuous oozing layers.
- Shallow Plates: Use shallow plates that are smaller than your cake tins (but still relatively close in size) and line them with cling film or parchment paper.
- Fill and Freeze: Pour the cooled jam into the plates, filling them about 1/2 to 3/4 inch deep. Spread the jam evenly and freeze until solid—about 2-3 hours or overnight.
- Use in Cake: When ready to assemble the cake, remove the jam disc from the plate, peel off the cling film or parchment, and layer it between your cake layers. The frozen disc will thaw as the cake sits, creating a dramatic oozing effect when sliced.
Option 2: Freeze Jam Pockets
For smaller, oozing pockets within the cake.
- Ice Cube Trays: Use standard ice cube trays, filling each slot about halfway with the raspberry jam. This will create small pockets of jam that will ooze throughout the cake.
- Freeze: Freeze the jam in the trays until solid—about 2-3 hours or overnight.
- Add to Cake: When frozen, pop the jam “blobs” out of the ice cube trays. Insert them between the cake layers while assembling, spacing them out as desired. The blobs will thaw and create small oozing pockets when you slice into the cake.
Tips for Freezing Jam Perfectly
- Use Cling Film for Easy Removal: Line the plates or ice cube trays with cling film for easy removal.
- Make Sure the Jam is Runny: The jam should be quite loose after cooking. If it cools and it looks too thick, warm it gently and add more water.
- Keep It Chilled Until Serving: You don’t want it seeping out the sides (or maybe you do - that would look cool, too!). So, keep it in the fridge so the frosting stays firm enough to hold the jam in place until sliced.
Tips for Perfect Dark Chocolate Cake
Want your cake to be absolutely perfect? Here are some tips to ensure your cake looks and tastes amazing:
- Freeze the Raspberry Filling Fully: Freezing the raspberry jam is key to creating the oozing effect. Make sure it’s completely frozen before assembling the cake so it doesn’t seep too much.
- Smooth Frosting: For a smooth frosting finish, add a thin crumb coat, then chill the cake briefly before applying the final layer of frosting. This helps prevent crumbs from getting mixed into the frosting.
- Chocolate Drip: To get the perfect chocolate drip effect, make sure the melted chocolate is slightly cooled before drizzling it over the cake. This will give you more control over how the chocolate drips down the sides.
- Don’t Worry About Mistakes: It’s a Halloween cake with oozing jam - it’s okay if it’s not perfect. In fact, that’ll add to the fun!
- Keep it Simple: You can easily make this more accessible with a boxed cake mix and a can of frosting!
Recipe Variations
Looking to make this cake your own? Try out some of these variations to add your own twist:
- Other Jam Flavors: Swap out raspberry jam for strawberry, blackberry, or cherry for a different “blood” flavor.
- Buttercream Frosting: If you prefer a sweeter frosting, you can use a classic buttercream instead of cream cheese frosting.
- Chocolate Filling: For extra indulgence, add a layer of chocolate ganache between the cake layers along with the raspberry filling.
- Add Scratches: Use a toothpick to draw scratch marks into the side of the set cake. Then, pipe a little jam into the space so it looks like a monster scratched into it!
FAQs
Got questions? I’ve got answers! Here are some common questions about making this spooky cake:
Q: Can I make the cake ahead of time?
A: Yes! You can bake the cake layers, make the filling, and whip up the frosting up to two days in advance. Wrap them tightly and store the cakes at room temperature until you’re ready to assemble the cake. Keep the frosting in the fridge and the jam in the freezer.
You can assemble the cake and keep it in the fridge overnight if needed. But I wouldn’t wait too long, as that filling might seep.
Q: Can I freeze the whole cake?
A: It’s best to freeze the raspberry filling separately and assemble the cake before serving. However, you can freeze the fully assembled cake (without decorations) and thaw it in the fridge before serving.
Q: Can I use a different type of frosting?
A: Absolutely! Buttercream, whipped cream (on the outside), or even a chocolate ganache would all work beautifully with this cake.
That said, be sure you choose something sturdy enough to handle those layers.
How to Store/Freeze
Here’s how to store and freeze this cake to keep it fresh and delicious:
- Store: Keep the assembled cake in the fridge for up to 3 days. Make sure it’s covered or placed in an airtight container to prevent the cake from drying out.
- Freeze: If you want to freeze the cake, freeze the raspberry “blood” filling separately. You can also freeze the cake layers in advance, wrapped tightly in plastic wrap. Once you’re ready to serve, assemble the cake with the frozen filling for that dramatic oozing effect.
Dark Chocolate Cake with Oozing Raspberry "Blood"
Ingredients:
- For the Cake Layers
- 260g all-purpose flour (2 cups)
- 400g granulated sugar (2 cups)
- 75g dark cocoa powder, sifted (3/4 cup)
- 2 teaspoons baking powder
- 1 1/2 teaspoons baking soda
- 1 teaspoon salt
- 240ml warm water (1 cup)
- 255g sour cream, room temperature (1 cup)
- 110ml vegetable oil (1/2 cup)
- 2 large eggs, room temperature
- 2 teaspoons vanilla extract
- 1 teaspoon instant espresso or coffee
- 200 grams dark chocolate, chopped, optional (a little more than 1 cup)
- For the Frosting
- 345 grams unsalted butter, room temperature (1.5 cups)
- 450 grams icing sugar, sifted after measuring (3.5-4 cups)
- 1kg full-fat cream cheese, cold (4.5 cups)
- 2 teaspoons pure vanilla extract
- For the Cake
- 300g frozen raspberry jam (1 cup)
- 100g shaved dark chocolate (1/2 cup)
- 85g semi-sweet chocolate chips (1/2 cup)
- 1 tablespoon butter
- fresh raspberries and plastic spiders, for decoration
Method:
- Prep and freeze the jam per the instructions in the post.
- Preheat the oven to 175°C (350°F). Grease and line three 20cm (8-inch) cake pans.
- Whisk the flour, sugar, cocoa powder, baking powder, baking soda, and salt in a large bowl. Set aside.
- In a separate bowl, whisk the water, sour cream, oil, eggs, vanilla, and instant espresso until fully incorporated.
- Stir the dry ingredients into the wet with a spatula, mixing until just combined. If using, fold in the chocolate.
- Divide the batter evenly between the prepared cake pans. Bake for 20-25 minutes or until a toothpick comes out with a few moist crumbs.
- Remove the cakes from the oven and let them cool in the pans for about 15 minutes. Flip onto a wire rack to cool.
- While the cakes cool, beat the butter and icing sugar until fluffy and smooth. Add the cream cheese and vanilla and beat for 5-7 minutes, until very thick and smooth.
- To assemble, place one cake layer on a serving plate and spread with a thin layer of frosting. Add the frozen raspberry filling, ensuring it’s inside the frosting layer so it doesn’t seep out the sides. Pipe a thick layer of frosting around the edges to act as a dam. Add more frosting on top, then repeat with the remaining layers.
- Frost the outside of the cake and decorate with chocolate shavings. Refrigerate for 2-3 hours.
- Melt the chocolate chips and butter until smooth and set aside to cool slightly. When the cake is set, drizzle the chocolate around the top edge to create a drip.
- If desired, top with more frosting in rosettes, chocolate shards, fresh raspberries, and plastic spiders. Slice and enjoy as the raspberry "blood" oozes from the cake!

