I still remember the first time I made choux pastry. I was a pastry student, nervous as hell, watching my dough come together in the pot, convinced I’d messed it up. The eggs looked like they’d curdled, my arm was aching from all the mixing, and I was this close to throwing it all in the bin.
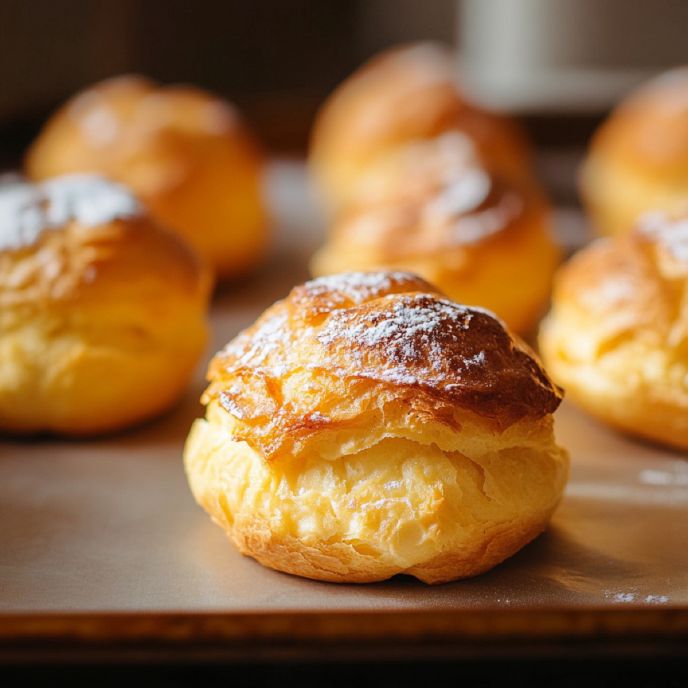
But I kept going, and—like magic—the dough turned smooth, glossy, and perfect. The result? Beautifully golden, crisp shells that made me feel like an actual pro.
If you’ve ever felt intimidated by choux pastry, trust me, you’re not alone! But I promise, once you understand the technique, you’ll feel unstoppable.
This recipe will guide you through every step, with tips I’ve learned as a pastry chef to help you avoid mistakes and achieve bakery-level results. Let’s get baking!

What is Choux Pastry?
Choux pastry (pâte à choux) is a classic French dough that puffs up beautifully without any baking powder or yeast—just steam! It starts as a simple stovetop mixture, turns into a glossy dough with the addition of eggs, and bakes into light, hollow shells ready to be filled with something delicious.
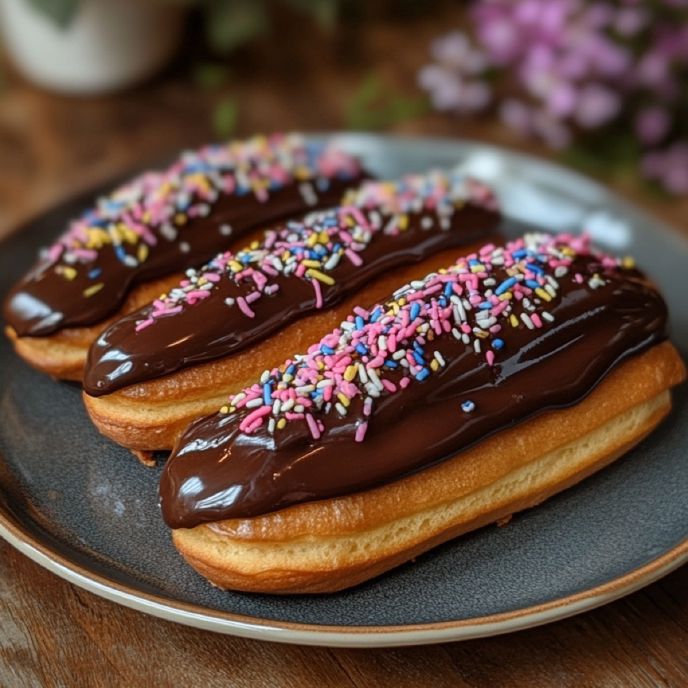
Think of those airy, crisp cream puffs, éclairs, and even cheesy gougères—all of them start with the same dough! I love how incredibly versatile choux is. You can go sweet, you can go savory, and you can impress literally anyone with homemade éclairs (seriously, people think they’re way harder than they are!).
Why You’ll Love This Recipe
✔ Light & Airy – Golden and crisp on the outside, soft and airy inside.
✔ Easier Than It Looks – No yeast, no kneading, just stovetop mixing and piping.
✔ Super Versatile – Fill them sweet or savory, dip them in chocolate, or eat them plain.
✔ Make-Ahead Friendly – Bake them in advance and fill when ready to serve.
Ingredients You’ll Need
Choux Pastry Base:
- Water – The key to creating steam, which helps the pastry rise.
- Butter – Adds richness and helps form that delicate crisp shell.
- Sugar – Helps with browning and adds just a touch of sweetness.
- Flour – Gives the dough structure and strength.
- Eggs – The magic ingredient! They provide moisture and structure for that signature puff.

How to Make Choux Pastry
Choux pastry isn’t about fancy ingredients—it’s all about technique. Follow these steps, and you’ll have golden perfection in no time.
1. Make the Dough (Panade)
Preheat your oven to 190°C (375°F).
Bring water, butter, and sugar to a rolling boil in a saucepan. You’ll know it’s ready when it bubbles like a kettle going full blast—this ensures the butter is fully melted.
Once boiling, add all the flour at once (careful of splashes!) and start stirring with a wooden spoon. Keep stirring over the heat until the mixture comes together in a smooth dough and starts pulling away from the sides of the pan. This helps cook out excess moisture, which is key to getting that light, puffy texture.
I always tell people: if your arm isn’t aching by the end of this step, you haven’t stirred enough!
2. Cool Slightly & Add the Eggs
Take the pan off the heat and let it cool slightly for a few minutes. (If you have a stand mixer, use the paddle attachment on low—it saves your arm!)
Lightly beat the eggs, then add them one spoonful at a time, beating well after each addition. It will look like an absolute mess at first, but keep going—the dough will smooth out, I promise!
A good way to test if your dough is ready? Scoop some onto a spoon, then turn it sideways—it should slowly fall off, forming a gentle ‘V’ shape. If it sticks too much, add a little more egg. If it flows off quickly, you’ve added enough!
3. Pipe & Bake
Fill a piping bag with the choux dough and pipe onto a parchment-lined baking sheet. (No piping bag? Just use a spoon!)
Leave space between them—they will puff up! Bake for 30 minutes (or 20 minutes for mini choux).
🚨 DO NOT open the oven while baking! I know it’s tempting, but the steam inside is what makes them rise. Opening the door too soon will turn them into sad, flat pancakes.
After 30 minutes, quickly poke a small hole in each pastry with a skewer or knife to release steam.
Return to the oven for another 5-10 minutes until golden brown.
How to Tell When They’re Done
- Color: Deep golden brown—too pale means they might collapse.
- Sound: Tap the bottom—they should sound hollow.
- Texture: Crisp outside, dry inside. If it feels wet, bake a little longer.
My YouTube video, which can be found below, goes through the whole recipe and method.
I had my boyfriend do it all, and you’ll see at the end that he made a great batch! He’d never even eaten an eclair before, but he was able to do it!
Tips For Success
✔ Measure Precisely – Choux is all about balance—too much or too little egg changes everything.
✔ Cook the Flour Mixture Well – If you don’t dry it out enough, the pastry won’t puff properly.
✔ Steam is Your Friend – Keep that oven door closed while baking!
✔ Test the Dough – The “V” test with the spoon ensures the perfect consistency.
Variations & Serving Ideas
Choux pastry is one of the most versatile things you can bake! Here are some fun ways to use it:
- Classic Cream Puffs – Fill with whipped cream or pastry cream, dust with powdered sugar.
- Éclairs – Pipe into longer shapes, fill with custard, and dip in chocolate.
- Savory Gougères – Mix in grated cheese for an irresistible, cheesy bite.
- Paris-Brest – A ring-shaped choux pastry filled with praline cream.
- Ice Cream Profiteroles – Fill with ice cream and drizzle with warm chocolate sauce.
Storing & Freezing Instructions
- Store: Keep unfilled choux pastry in an airtight container at room temperature for up to 2 days.
- Freeze: Baked choux puffs freeze beautifully! Cool completely, store in a zip-top bag, and freeze for up to 3 months. Re-crisp in a 300°F (150°C) oven for 5-10 minutes before using.
Choux Pastry Recipe
Ingredients:
- 125ml water
- 60g butter
- 1T sugar
- 75g flour
- 2 eggs
Method:
- Preheat the oven to 190/375.
- Bring the water, sugar, and butter to a rolling boil on the stovetop - this means it should be bubbling like a kettle
- When the liquid starts to roll, add the scaled flour to the pot all at once (careful of splashes) and begin to mix with a wooden spoon, keeping the pot on the heat. Take it easy at first until it starts to come together, and then beat to a smooth dough that comes away from the side of the pot. Remove from heat
- Allow the mixture to cool slightly - if you have a stand mixer, you can beat on low with a paddle to help the steam escape
- Lightly beat the eggs and begin to incorporate them into the pot. Add in a couple of tablespoons at a time, beating vigorously between additions. It will look curdled at first, but continue to beat until it becomes smooth again - it will, I promise!
- Add the eggs, little by little, until the dough/batter is smooth and glossy. It needs to be firm enough to pipe and hold its shape. A good way to test is to grab a spoon and scoop up some of the dough/batter. Hold the spoon sideways and let the batter drop. If it stays firm on the spoon, you need a little more egg. If it slowly drops, it’s good to go! Do this a few times if you’re unsure, so you don’t add too much egg!
- Place the mixture into a piping bag (tip optional) and pipe onto a parchment-lined baking sheet. Leave some space between, because they will expand and rise.
- Put the tray into the oven and set a 30-minute timer (unless you are doing mini’s, in which case check them after around 20 minutes) Don’t be tempted to open the oven! They need the heat and steam to rise, and opening the door will let it all escape. Be strong!
- After the 30 minutes, quickly open the door and prick each bun or eclair with a knife or skewer (anywhere will do, you don’t have to pick them up), and place back in the oven for another 5-10 minutes. You should see how they look at this point and may need to adjust the time left (ovens vary)
- The Choux should come out of the oven looking golden brown. They should sound hollow when tapped on the bottom. If they look too pale, bake them a little longer. If you’re not totally sure, cut one open and see. If it’s still wet, they need a little longer. As I said, all ovens are different so it’s hard to give exact numbers.
- When they have cooled down, you can fill them and decorate! Pastry cream, whipped cream, ganache, whatever you like! They are so versatile. Stripe with melted chocolate or dip in ganache for a shine. They are cute and impressive no matter what!
